Tuna Salad Sandwiches: A Nutritious and Affordable Meal

At the Narberth Community Food Bank, we strive to provide our neighbors with nutritious and accessible food options. One of the best pantry staples we distribute is canned tuna—a versatile, protein-packed ingredient that can be turned into a delicious meal in just minutes.

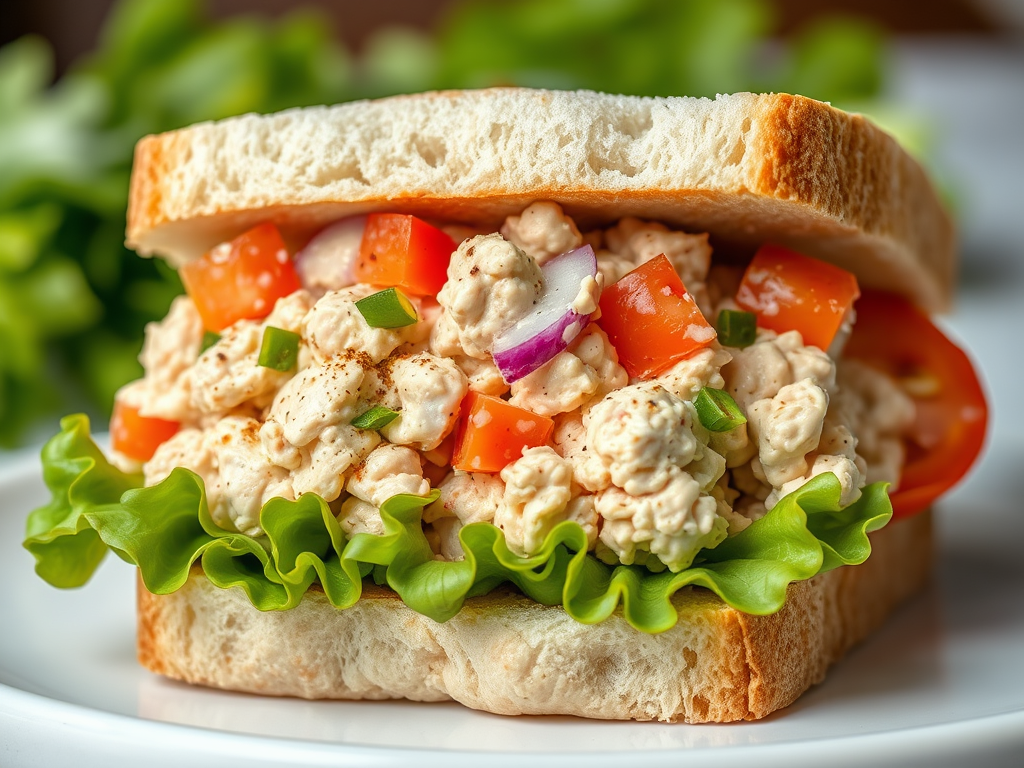
One of our favorite ways to use canned tuna is in Tuna Salad Sandwiches. This classic meal is not only easy to make but also affordable, filling, and packed with nutrients. Whether you’re preparing lunch for your family or need a quick and healthy meal, tuna salad is a go-to option that can be customized with whatever ingredients you have on hand.

Read on to learn about the benefits of tuna, tips for making a great tuna salad, and our easy, pantry-friendly tuna salad sandwich recipe!


The Benefits of Eating Tuna

Canned tuna is a nutritional powerhouse that offers a variety of health benefits:

🐟 High in Protein – Tuna is a great source of lean protein, which helps keep you full and supports muscle health.
💙 Heart-Healthy Omega-3s – These essential fatty acids are good for heart health and brain function.
🔋 Rich in Vitamins & Minerals – Tuna contains vitamin B12, iron, and selenium, which are important for energy and immunity.
🌎 Budget-Friendly & Shelf-Stable – Canned tuna is affordable, easy to store, and has a long shelf life, making it a great pantry staple.

With these benefits in mind, let’s dive into how to make the perfect tuna salad sandwich!


Classic Tuna Salad Sandwich Recipe

Ingredients:

🥫 1 (5 oz) can tuna, drained
🥄 2 tbsp mayonnaise (or plain yogurt for a lighter option)
🌿 1 tsp mustard (optional, for added flavor)
🥒 2 tbsp chopped pickles or relish (optional, adds crunch & tang)
🧅 2 tbsp diced celery or onion (optional, for extra crunch)
🧂 Salt & pepper to taste
🍋 1 tsp lemon juice (optional, for freshness)
🍞 4 slices of bread or rolls
🥬 Lettuce or tomato slices (optional toppings)


Instructions:

1️⃣ Prepare the Tuna:

  • Drain the canned tuna and place it in a mixing bowl. Use a fork to flake it into small pieces.

2️⃣ Mix the Ingredients:

  • Add mayonnaise, mustard (if using), pickles or relish, celery/onion, salt, and pepper.
  • Mix well until all ingredients are evenly combined.

3️⃣ Assemble the Sandwiches:

  • Spread the tuna salad onto a slice of bread.
  • Add lettuce and tomato if desired.
  • Top with another slice of bread or serve open-faced.

4️⃣ Serve & Enjoy!

  • Serve with a side of fruit, chips, or a small salad for a balanced meal.

Ways to Customize Your Tuna Salad

One of the best things about tuna salad is that it can be easily adjusted based on what you have available:

🥑 Healthy Swap: Use mashed avocado instead of mayo for a creamy, nutritious alternative.
🌶 Spicy Kick: Add a dash of hot sauce or a sprinkle of red pepper flakes.
🥕 Extra Veggies: Mix in shredded carrots, bell peppers, or cucumber for more crunch.
🥚 Protein Boost: Add chopped boiled eggs to make it even more filling.

No matter how you make it, tuna salad is a quick, nutritious, and satisfying meal that can be enjoyed in sandwiches, wraps, or even on top of a salad.


Why Meals Like This Matter

At the Narberth Community Food Bank, we aim to provide accessible, nutritious meals for families facing food insecurity. Recipes like this help stretch ingredients, making the most out of affordable pantry staples.

When you donate canned tuna, mayonnaise, or bread, you’re directly helping families prepare easy, nourishing meals. Simple meals like tuna salad sandwiches can bring comfort and stability to those who need it most.


How You Can Help

If you’d like to support the Narberth Community Food Bank, here’s how you can make a difference:

🍎 Donate Non-Perishable Foods – Canned proteins (like tuna), whole grain bread, and condiments are always in demand.
💰 Make a Financial Contribution – Every dollar helps us purchase fresh and healthy food for families in need.
🤝 Volunteer Your Time – Help sort donations, prepare food bags, or assist during distribution days.
📢 Spread the Word – Share our mission on social media or organize a local food drive.

Together, we can ensure that no family in our community has to go hungry.


Final Thoughts

Tuna salad sandwiches are a simple yet powerful meal—affordable, nutritious, and easy to prepare. Whether you’re making this for your own family or helping to provide meals for others through the Narberth Community Food Bank, every meal matters.

If you try this recipe or have your own favorite way to make tuna salad, we’d love to hear from you! Share your favorite variations and tag us on social media.

Thank you for being a part of our community and for supporting our mission to fight hunger, one meal at a time. ❤️

🌟 Visit https://www.narberthcommunityfoodbank.org or contact us at 484 754 6404 to learn more about how you can help!

a cardboard box full of money with a tag on the box that says donate

Healthy, Delicious, and Budget-Friendly: Veggie Stir-Fry Recipe

At Narberth Community Food Bank, we believe that eating healthy doesn’t have to be expensive or complicated. One of the best ways to enjoy a nutritious, satisfying meal on a budget is by making a veggie stir-fry. This dish is not only packed with vitamins and fiber, but it’s also versatile, affordable, and easy to prepare.

With just a few pantry staples and fresh (or frozen) vegetables, you can create a meal that’s both delicious and filling. Whether you serve it on its own or pair it with rice or noodles, this veggie stir-fry is perfect for a quick lunch or dinner.


Why Stir-Fry?

Stir-frying is a fantastic cooking method for several reasons:

🥕 Uses Simple Ingredients – You can make a great stir-fry with whatever vegetables you have on hand.
Quick and Easy – It takes less than 30 minutes to prepare!
💰 Budget-Friendly – Uses affordable, accessible ingredients, many of which can be found at food pantries.
🥦 Nutrient-Rich – Packed with vitamins, minerals, and fiber from fresh vegetables.
🍽 Customizable – Add protein, change up the sauce, or adjust the spice level based on your preference!


Ingredients

🥦 Vegetables (Use What You Have!):

  • 2 cups mixed vegetables (bell peppers, broccoli, carrots, snap peas, cabbage, onions, etc.)
  • 1 tablespoon vegetable oil (or any cooking oil)
  • 2 cloves garlic, minced (or ½ teaspoon garlic powder)
  • ½ teaspoon ginger (fresh, grated, or ground)

🍜 For the Stir-Fry Sauce:

  • ¼ cup soy sauce (or low-sodium alternative)
  • 1 tablespoon vinegar (white, apple cider, or rice vinegar)
  • 1 tablespoon honey or sugar
  • 1 teaspoon cornstarch (to thicken)
  • ¼ cup water

🍚 Serving Suggestions:

  • Cooked rice (white, brown, or jasmine)
  • Cooked noodles (ramen, spaghetti, or rice noodles)
  • Optional: ½ cup cooked chicken, tofu, or beans for extra protein

How to Make Veggie Stir-Fry

Step 1: Prepare Your Ingredients

  • Wash and chop all vegetables into bite-sized pieces.
  • In a small bowl, mix the stir-fry sauce ingredients until well combined. Set aside.

Step 2: Cook the Vegetables

  1. Heat the oil in a large pan or wok over medium-high heat.
  2. Add the garlic and ginger, stirring for about 30 seconds until fragrant.
  3. Add the harder vegetables first (like carrots and broccoli) and cook for 3-4 minutes.
  4. Add softer vegetables (like bell peppers or cabbage) and cook for another 2-3 minutes.

Step 3: Add the Sauce

  1. Pour the stir-fry sauce over the vegetables and stir well.
  2. Cook for 2-3 more minutes until the sauce thickens and coats the veggies.
  3. If adding protein (chicken, tofu, or beans), stir it in now.

Step 4: Serve & Enjoy!

  • Serve over cooked rice or noodles.
  • Garnish with sesame seeds, chopped green onions, or a squeeze of lemon for extra flavor.

Budget-Friendly & Pantry Tips

💡 Use Frozen Vegetables – They’re just as nutritious as fresh and often more affordable!
💡 Substitutes Work! – No soy sauce? Try a mix of salt and a splash of vinegar. No honey? Sugar works too!
💡 Stretch Your Meal – Add more rice or noodles to make this dish feed more people.
💡 Protein Boost – Add canned beans or eggs if you don’t have chicken or tofu.


Why This Recipe Works for Everyone

🌟 It’s Kid-Friendly – Sweet and savory flavors make it a hit with little ones.
🌟 Great for Meal Prep – Make a big batch and enjoy leftovers throughout the week.
🌟 Supports Healthy Eating – Packed with fiber, vitamins, and minerals.
🌟 Perfect for Food Pantry Ingredients – Many of the ingredients (rice, canned veggies, and soy sauce) are commonly available at food banks.


Make a Difference: Share & Donate!

At [Your Food Pantry Name], we encourage our community to cook healthy, affordable meals and support those in need. If you have extra pantry staples, consider donating to help others prepare nourishing meals like this veggie stir-fry.

🛒 Looking to donate? Our most-needed items include:
✔️ Rice, pasta, and noodles
✔️ Canned vegetables and beans
✔️ Cooking oil and seasonings
✔️ Canned proteins (chicken, tuna, tofu)

Visit us at [Your Food Pantry Name] to donate or receive assistance. Together, we can make healthy meals accessible to everyone!

Happy cooking! 🍽️🥕🌟

a cardboard box full of money with a tag on the box that says donate

Homemade Pizza: A Fun and Delicious Meal for Everyone

There’s nothing quite like the taste of a fresh, homemade pizza straight from the oven. Whether you’re feeding a family, hosting a casual get-together, or simply craving a slice of comfort food, homemade pizza is a versatile and budget-friendly meal that everyone can enjoy. Best of all, making pizza at home allows you to customize it to your heart’s content, ensuring that even the pickiest eaters find something they love. With a few simple ingredients, some creativity, and a little patience, you can create a delicious, restaurant-quality pizza right in your own kitchen.

The Joy of Making Pizza from Scratch

One of the best parts about making pizza at home is that it’s an activity the whole family can participate in. Kids love kneading the dough, spreading the sauce, and adding their favorite toppings, making it an enjoyable and interactive way to cook together. Not to mention, homemade pizza can be much healthier than store-bought or takeout options because you have complete control over the ingredients.

Another great benefit of homemade pizza is its affordability. By using pantry staples like flour, yeast, canned tomatoes, and cheese, you can make multiple pizzas for a fraction of the cost of delivery. Plus, it’s a great way to use up leftovers—those extra veggies, bits of meat, or even last night’s roasted chicken can make excellent toppings.

Essential Ingredients for Homemade Pizza

To get started with homemade pizza, you’ll need a few basic ingredients:

  • Pizza Dough: This can be homemade (recipe below) or store-bought for convenience.
  • Pizza Sauce: A simple tomato sauce seasoned with garlic, oregano, and basil works great.
  • Cheese: Mozzarella is the classic choice, but you can experiment with cheddar, parmesan, or even feta.
  • Toppings: The sky’s the limit! Traditional options include pepperoni, mushrooms, onions, bell peppers, olives, and sausage. For a gourmet twist, try arugula, goat cheese, prosciutto, or caramelized onions.
  • Seasonings and Extras: A drizzle of olive oil, a sprinkle of red pepper flakes, or fresh basil can elevate your pizza.

How to Make Homemade Pizza Dough

Making your own pizza dough is easier than you might think, and it gives your pizza that authentic, homemade touch. Here’s a simple recipe to get you started:

Ingredients:

  • 2 1/4 teaspoons (1 packet) active dry yeast
  • 1 1/2 cups warm water (about 110°F)
  • 3 1/2 to 4 cups all-purpose flour
  • 2 tablespoons olive oil
  • 1 teaspoon salt
  • 1 teaspoon sugar

Instructions:

  1. In a small bowl, dissolve the yeast and sugar in the warm water. Let it sit for about 5-10 minutes until it becomes frothy.
  2. In a large mixing bowl, combine 3 1/2 cups of flour and salt. Add the yeast mixture and olive oil, and stir until the dough starts to come together.
  3. Transfer the dough to a floured surface and knead for about 8-10 minutes until it becomes smooth and elastic. If the dough is too sticky, gradually add the remaining flour as needed.
  4. Place the dough in a lightly oiled bowl, cover with a clean kitchen towel, and let it rise in a warm place for about 1 to 1.5 hours, or until it doubles in size.
  5. Once risen, punch down the dough and divide it into two portions. Roll out each portion to your desired thickness for pizza crusts.

Assembling and Baking Your Pizza

Instructions:

  1. Preheat your oven to 475°F (245°C). If using a pizza stone, place it in the oven while preheating for a crispier crust.
  2. Prepare your pizza base: Roll out the dough on a lightly floured surface to your desired thickness. Transfer it to a baking sheet or pizza stone.
  3. Add sauce and toppings: Spread a thin layer of pizza sauce over the dough, leaving about an inch around the edges for the crust. Sprinkle cheese evenly and then add your favorite toppings.
  4. Bake the pizza: Place the pizza in the oven and bake for 12-15 minutes, or until the crust is golden brown and the cheese is bubbly and slightly browned.
  5. Cool and serve: Remove the pizza from the oven and let it rest for a few minutes before slicing. Enjoy!

Tips for the Best Homemade Pizza

  • Use high-quality ingredients: The better the ingredients, the better the pizza. Fresh mozzarella, homemade sauce, and good-quality flour can make a big difference.
  • Don’t overload with toppings: Too many toppings can make the pizza soggy. Stick to a few key ingredients for the best results.
  • Preheat your oven properly: A hot oven ensures a crispy crust and evenly cooked toppings.
  • Experiment with flavors: Try different cheeses, sauces, and toppings to find your perfect combination.
  • Freeze extra dough: If you make more dough than needed, wrap it tightly and freeze it for future pizza nights.

Final Thoughts

Homemade pizza is not only delicious but also a wonderful way to bring people together. Whether you prefer classic cheese, meat-lover’s delight, or veggie-packed goodness, making your own pizza gives you endless possibilities. So, roll up your sleeves, gather your favorite toppings, and get ready to enjoy a slice of homemade heaven. Happy baking!

a cardboard box full of money with a tag on the box that says donate

Nourishing Hearts: Recipes and Tips for Heart-Healthy Eating

Heart health is a cornerstone of overall wellness. Making mindful food choices can significantly reduce the risk of heart disease. At our food pantry, we believe that everyone deserves access to nutritious, heart-healthy meals that promote long-term health. This month, we’re sharing tips, recipes, and strategies to help you incorporate heart-friendly foods into your daily life.

What Makes a Food Heart-Healthy?

Heart-healthy foods are those that support cardiovascular health by helping to manage cholesterol levels, blood pressure, and weight. These foods are rich in fiber, antioxidants, healthy fats, and essential vitamins and minerals. To create a heart-healthy diet, focus on:

  • Whole Grains: High in fiber, whole grains like oatmeal, brown rice, and whole-wheat bread help lower LDL (bad) cholesterol levels.
  • Fruits and Vegetables: Packed with antioxidants, potassium, and fiber, they protect the heart and promote overall health.
  • Lean Proteins: Opt for chicken, fish, beans, and legumes instead of red or processed meats.
  • Healthy Fats: Include sources like avocados, nuts, seeds, and olive oil while minimizing saturated and trans fats.
  • Low-Sodium Options: Excess sodium can increase blood pressure, so choose foods labeled “low sodium” or “reduced salt.”

Easy Heart-Healthy Recipes

Here are three recipes to inspire heart-healthy cooking. They’re simple, affordable, and delicious—perfect for any household.

1. Black Bean and Veggie Stir-Fry

  • Ingredients:
    • 1 can (15 oz) black beans, rinsed and drained
    • 2 cups mixed vegetables (e.g., bell peppers, broccoli, carrots)
    • 2 tablespoons olive oil
    • 2 tablespoons low-sodium soy sauce
    • 1 teaspoon garlic powder
    • 1 teaspoon ground ginger
  • Instructions:
    1. Heat olive oil in a large skillet over medium heat.
    2. Add mixed vegetables and sauté until tender, about 5-7 minutes.
    3. Stir in black beans, soy sauce, garlic powder, and ginger. Cook for another 2-3 minutes.
    4. Serve over brown rice or quinoa for a complete meal.

2. Berry Oatmeal Breakfast Bowl

  • Ingredients:
    • ½ cup rolled oats
    • 1 cup low-fat milk or a dairy alternative
    • ½ cup mixed berries (fresh or frozen)
    • 1 tablespoon chopped nuts (e.g., almonds or walnuts)
    • 1 teaspoon honey or maple syrup (optional)
  • Instructions:
    1. Cook oats in milk over medium heat until creamy, about 5 minutes.
    2. Top with berries, nuts, and a drizzle of honey or maple syrup if desired.
    3. Enjoy a warm, fiber-rich breakfast that’s good for your heart.

3. Baked Chicken with Sweet Potatoes and Green Beans

  • Ingredients:
    • 4 boneless, skinless chicken breasts
    • 2 medium sweet potatoes, diced
    • 2 cups green beans, trimmed
    • 2 tablespoons olive oil
    • 1 teaspoon paprika
    • 1 teaspoon garlic powder
    • Salt and pepper to taste
  • Instructions:
    1. Preheat oven to 375°F (190°C).
    2. Arrange chicken, sweet potatoes, and green beans on a baking sheet.
    3. Drizzle with olive oil and season with paprika, garlic powder, salt, and pepper.
    4. Bake for 25-30 minutes or until the chicken is cooked through and the sweet potatoes are tender.

Tips for Incorporating Heart-Healthy Habits

Making heart-healthy choices doesn’t have to be overwhelming. Here are some tips to help you get started:

  1. Cook at Home: Preparing meals at home allows you to control ingredients and portion sizes. This ensures they align with your dietary goals.
  2. Snack Smart: Choose heart-friendly snacks like fresh fruit, unsalted nuts, or whole-grain crackers instead of chips or sugary treats.
  3. Read Labels: Pay attention to nutritional labels to avoid hidden sodium, sugar, and unhealthy fats.
  4. Hydrate Wisely: Swap sugary beverages for water, herbal tea, or sparkling water with a splash of lemon.
  5. Experiment with Spices: Reduce salt intake by seasoning your meals with herbs and spices like basil, oregano, turmeric, and cumin.
  6. Stay Active: Pair your healthy eating habits with regular physical activity, such as walking, dancing, or gardening.

How We’re Supporting Heart-Healthy Choices

At our food pantry, we strive to provide options that align with heart-healthy eating principles. We offer whole grains and fresh produce. We also provide lean proteins and low-sodium canned goods. Our commitment is to ensure that our offerings support the well-being of our community.

We also offer educational resources like cooking demonstrations, nutrition workshops, and recipe cards. These are designed to help individuals and families make the most of the food they receive. If you have questions about creating heart-healthy meals or need inspiration, our team is here to help.

Building a Healthier Future Together

Heart health is a shared responsibility, and small changes can lead to big results. Choose heart-healthy foods. Try new recipes. Adopt mindful habits. We can all take steps toward a healthier, happier future.

As we celebrate American Heart Month, let’s remember something important. The food we eat not only fuels our bodies. It also nurtures our hearts. Together, we can create a community where nutritious meals and healthy lifestyles are accessible to everyone. Thank you for partnering with us in this mission, and here’s to many meals filled with love, health, and joy.

a cardboard box full of money with a tag on the box that says donate

Green Bean Casserole: A Timeless Comfort Food That Brings Us Together

A Classic Dish with a Rich History

photo of green bean casserole

“No potluck or family table feels complete without the comforting layers of creamy, crunchy green bean casserole.” It’s a dish that evokes nostalgia and warmth, reminding many of gatherings with loved ones and shared laughter. Green bean casserole has been a staple of American kitchens. Dorcas Reilly, a Campbell’s Soup employee, created it in 1955. Designed as a simple and affordable recipe, it quickly became a household favorite.

Over the decades, green bean casserole has earned its place as a culinary classic. It is loved for its versatility. Its crowd-pleasing nature is appreciated. It is more than just a dish. It symbolizes togetherness and simplicity. This makes it a perfect addition to any gathering.


The Ingredients That Make It Special

The heart of green bean casserole is its simple ingredients. These include tender green beans, creamy mushroom soup, and crispy fried onions. Each element complements the others, creating a dish that’s both hearty and satisfying. The green beans provide a fresh, mild base, while the cream of mushroom soup adds a savory richness. The fried onions? They bring a delightful crunch that ties everything together.

Modern cooks have put their own spin on this classic dish. They add fresh green beans for a vibrant, crisp texture. Some replace the cream of mushroom soup with alternatives like cream of chicken or cheddar cheese soup. Some cooks enhance the flavor profile with garlic. Others use grated cheese or crumbled bacon. Some make it vegetarian-friendly with plant-based soups and toppings.

The enduring popularity of green bean casserole lies in its flexibility. You can stick to the original recipe. Alternatively, you can adapt it to your tastes. The dish’s comforting flavors and simplicity make it a perennial favorite for gatherings of all kinds.


The Role of Green Bean Casserole in Community and Tradition

Few dishes are as synonymous with community as green bean casserole. Its comforting, familiar flavors have made it a staple at potlucks, community meals, and family dinners for generations. It’s a dish that bridges divides, bringing people together around a shared table.

Green bean casserole is also incredibly practical. It is affordable and easy to prepare. This makes it an ideal choice for feeding a crowd. It’s often included in food pantry boxes or shared at community events. For individuals or families receiving pantry support, green bean casserole represents more than just sustenance. It’s a way to create a meal that feels special and celebratory. This is true even on a tight budget.

At our food pantry, green bean casserole has become a recurring favorite. One recipient shared a touching story. A donated can of fried onions reminded them of making the dish with their grandmother during childhood. Another family expressed gratitude. They recreated the dish for their own dinner table. They used ingredients from one of our food boxes. Stories like these remind us of the power of food to create connection and joy.


Recipe Spotlight: How to Make the Perfect Green Bean Casserole

For those looking to create this timeless dish, here’s a straightforward recipe that never fails:

Classic Green Bean Casserole Recipe

  • Ingredients:
    • 4 cups cooked green beans (fresh, frozen, or canned)
    • 1 can (10.5 oz) cream of mushroom soup
    • ¾ cup milk
    • 1 teaspoon soy sauce
    • 1 ½ cups crispy fried onions
  • Instructions:
    1. Preheat your oven to 350°F.
    2. In a mixing bowl, combine the soup, milk, and soy sauce. Stir in the green beans and ⅔ cup of the fried onions.
    3. Transfer the mixture to a baking dish and bake for 25 minutes.
    4. Sprinkle the remaining fried onions on top and bake for an additional 5 minutes until golden and crispy.
    5. Serve and enjoy!

Pro Tips:

  • For extra flavor, sauté fresh mushrooms and garlic before mixing them with the soup.
  • Use fresh green beans for a brighter, crisper dish. Blanch them before baking for the best results.
  • Make it vegetarian by using plant-based cream of mushroom soup and fried onions.

Don’t be afraid to get creative! This dish can be a canvas for your culinary imagination, so feel free to customize it to suit your tastes.


Sharing the Love with Green Bean Casserole

Food has a unique way of bringing people together, and green bean casserole is no exception. We encourage you to share your favorite recipe variations or memories of making this dish with loved ones.

If you’d like to help others enjoy this comforting meal, consider donating the ingredients. These include canned green beans, cream of mushroom soup, and fried onions. You can donate them to our pantry. Your contribution can help a family experience the joy of creating and sharing this timeless dish.

You’re also invited to join us for an upcoming community potluck, where green bean casserole will take center stage. Let’s celebrate the power of food to foster connection and kindness.


Why Green Bean Casserole is Here to Stay

Green bean casserole is more than just a recipe. It’s a tradition that carries the warmth of home. It also brings the joy of sharing. Served at a community dinner or a family table, it appeals because of its simplicity. It has the remarkable ability to bring people together.

Thank you to everyone who supports our food pantry and helps spread the love of food and connection. Together, we’re ensuring that no one goes without a meal that feels like home.

Here’s to the timeless tradition of green bean casserole—and the many stories it inspires.

a cardboard box full of money with a tag on the box that says donate

How to Make the Perfect Baked Ham: A Delicious and Easy Recipe

There are few dishes that embody the essence of comfort and celebration quite like a beautifully baked ham. Whether it’s for a holiday meal, a family gathering, or a Sunday dinner, baked ham is a centerpiece that’s both impressive and relatively easy to prepare. With its sweet, savory glaze and tender, juicy meat, a well-cooked ham is the perfect dish for feeding a crowd or enjoying leftovers for days to come.

If you’ve ever been intimidated by the idea of baking a ham at home, fear not. This simple recipe will guide you through the steps to achieve a flavorful, succulent ham with a delicious glaze that your family and guests will love. Let’s dive in and discover how to make the perfect baked ham!

Why Bake a Ham?

Ham is a versatile and flavorful cut of meat that is often reserved for special occasions, but it doesn’t have to be complicated to make. Baked ham is not only delicious, but it also offers the convenience of leftovers that can be used in sandwiches, soups, or salads throughout the week. The beauty of ham is that it’s already cooked when you buy it (unless you opt for a raw ham), so all you’re really doing is reheating it while infusing it with your choice of flavors through a glaze.

This recipe focuses on using a bone-in, fully cooked ham, which is ideal for baking. The bone adds extra flavor, and the meat around it becomes incredibly tender as it cooks. You can use a spiral-sliced ham if you prefer, but the steps remain the same.

Ingredients for Baked Ham

For this baked ham recipe, you’ll need the following ingredients:

For the Ham:

  • 1 (8-10 lb) bone-in, fully cooked ham
  • 1 tablespoon olive oil (or melted butter) for rubbing the ham

For the Glaze:

  • 1 cup brown sugar (packed)
  • 1/2 cup Dijon mustard (or yellow mustard, if preferred)
  • 1/4 cup apple cider vinegar (or orange juice for a sweeter taste)
  • 1/4 cup honey (optional for extra sweetness)
  • 1/2 teaspoon ground cinnamon (optional for a warm, spicy note)
  • 1/4 teaspoon ground cloves (optional, but adds depth of flavor)
  • 1/4 teaspoon ground ginger (optional for a subtle kick)

Instructions for Baking Ham

Step 1: Preheat the Oven and Prepare the Ham

Start by preheating your oven to 325°F (163°C). This temperature ensures that the ham heats slowly and evenly, which keeps it moist and flavorful.

Next, prepare your ham by removing any packaging, including the plastic cap that often covers the bone. If there’s any excess fat on the surface of the ham, trim it off, but leave a thin layer to help keep the meat juicy as it cooks. Pat the ham dry with paper towels and rub the entire surface with olive oil or melted butter. This helps the glaze stick and adds flavor.

Step 2: Score the Ham

To allow the glaze to penetrate the ham and give it a beautiful, caramelized finish, you’ll want to score the surface. Using a sharp knife, make shallow cuts in a diamond or crisscross pattern about 1/2-inch deep across the top and sides of the ham. Scoring the ham also helps with the presentation, as the glaze will settle into the cuts, giving the ham a glossy, attractive look.

Step 3: Make the Glaze

Now it’s time to prepare the glaze! In a small saucepan, combine the brown sugar, Dijon mustard, apple cider vinegar, honey, and any optional spices (such as cinnamon, ginger, or cloves). Heat the mixture over medium heat, stirring occasionally until the sugar dissolves and the glaze thickens slightly, about 5 minutes. Once the glaze is ready, set it aside.

Step 4: Bake the Ham

Place the prepared ham on a roasting pan or baking sheet lined with aluminum foil. If you have a rack to place the ham on, that will help keep it elevated and cook more evenly, but it’s not necessary.

Now it’s time to bake! Brush a generous amount of glaze over the top and sides of the ham, making sure to get into the scored areas. Cover the ham loosely with foil and place it in the preheated oven. Bake for about 1.5 to 2 hours, basting with the glaze every 30 minutes to build up layers of flavor.

Step 5: Final Glaze and Caramelization

After 1.5 to 2 hours of baking, remove the foil and give the ham one final glaze. Return it to the oven uncovered for an additional 20-30 minutes, or until the glaze is golden and caramelized. The surface of the ham should have a beautiful, sticky shine.

During this final step, keep an eye on the ham to ensure the glaze doesn’t burn. If the glaze starts to darken too much, you can tent the ham loosely with foil again and continue baking until the ham reaches the desired color.

Step 6: Let the Ham Rest and Serve

Once the ham is done baking and the glaze is beautifully caramelized, remove it from the oven. Let the ham rest for 15-20 minutes before slicing. This resting period allows the juices to redistribute, keeping the meat moist and tender.

When slicing, cut along the bone, starting at the larger end and working your way to the smaller end. The slices should be about 1/2-inch thick, but you can adjust according to your preference.

Tips for the Perfect Baked Ham

  • Choose the right size ham: A 8-10 lb ham is typically perfect for a family of 6-8 people, but you can adjust the size based on the number of guests you’ll be serving.
  • Make extra glaze: If you love that sticky, sweet glaze, you can double the recipe and reserve some to serve on the side for dipping.
  • Use a meat thermometer: To be sure your ham is perfectly heated through, use a meat thermometer. The internal temperature should reach about 140°F (60°C) if it’s fully cooked. If you’re cooking a raw ham, you’ll want the temperature to reach 190°F (88°C) to make it tender enough for easy slicing.
  • Leftover ham ideas: Leftover baked ham is incredibly versatile. Use it in sandwiches, soups, salads, or casseroles. It also freezes well for later use in recipes like ham and cheese quiches or ham croquettes.

Final Thoughts

Baked ham is the kind of dish that never fails to impress. With just a few simple ingredients and some patience, you can create a tender, flavorful ham with a beautiful caramelized glaze that will have everyone asking for the recipe. Whether it’s for a special occasion or just a hearty family dinner, this baked ham recipe is sure to become a favorite in your home. So go ahead, preheat that oven, and treat yourself and your loved ones to a meal that’s as delicious as it is satisfying. Happy baking!

Festive and Nutritious Holiday Recipes: Feeding Families with Love and Health in Mind

Festive and Nutritious Holiday Recipes: Feeding Families with Love and Health in Mind

The holiday season is often a time for gathering, sharing meals, and creating memories around the dinner table. However, for many families, putting together a nutritious and festive holiday meal can feel like a daunting task—especially when working within a limited budget. But it doesn’t have to be. At our food pantry, we understand the importance of providing not only filling meals but also ones that are nourishing and healthy. With a little creativity and planning, you can make holiday meals that are both festive and nutritious, offering families a chance to celebrate the season while also prioritizing their health.

In this article, we’ll share some holiday-inspired recipes that are not only budget-friendly but also packed with nutrients. These meals focus on using accessible pantry staples and fresh ingredients to create balanced, delicious dishes that everyone can enjoy. From hearty soups to vibrant side dishes and wholesome desserts, these recipes will add flavor and nutrition to your holiday gatherings.

1. Hearty Vegetable and Bean Soup

A warm bowl of soup is the perfect way to start a holiday meal, especially when you’re looking for a comforting yet nutritious option. This vegetable and bean soup is filling, affordable, and packed with fiber, vitamins, and minerals. It’s also versatile, allowing you to use whatever seasonal vegetables you have on hand or find at your local food pantry.

Ingredients:

  • 1 tablespoon olive oil
  • 1 medium onion, chopped
  • 2 garlic cloves, minced
  • 2 carrots, peeled and diced
  • 2 celery stalks, chopped
  • 1 zucchini, chopped
  • 1 can (15 oz) diced tomatoes
  • 1 can (15 oz) white beans (such as cannellini or navy beans), drained and rinsed
  • 6 cups low-sodium vegetable broth or water
  • 1 teaspoon dried thyme
  • 1/2 teaspoon dried rosemary
  • Salt and pepper, to taste
  • 2 cups chopped leafy greens (such as spinach or kale)

Instructions:

  1. Heat olive oil in a large pot over medium heat. Add the onion and garlic, and sauté for 3-4 minutes until softened.
  2. Add the carrots, celery, and zucchini. Cook for an additional 5 minutes, stirring occasionally.
  3. Stir in the diced tomatoes, beans, vegetable broth, thyme, rosemary, salt, and pepper. Bring to a boil, then reduce the heat and simmer for 20-25 minutes, or until the vegetables are tender.
  4. Add the leafy greens in the last few minutes of cooking and stir until wilted.
  5. Serve hot with a slice of whole-grain bread for a filling, nutritious holiday starter.

This vegetable and bean soup is packed with fiber, vitamins, and antioxidants, making it a perfect addition to any holiday table.

2. Roasted Sweet Potatoes with Cinnamon and Walnuts

Sweet potatoes are a holiday favorite, and they’re a great source of fiber, vitamins A and C, and potassium. Roasting them enhances their natural sweetness, and when paired with cinnamon and walnuts, you get a festive, nutrient-dense side dish that’s sure to please everyone.

Ingredients:

  • 4 medium sweet potatoes, peeled and cubed
  • 1 tablespoon olive oil
  • 1/2 teaspoon ground cinnamon
  • 1/4 teaspoon ground nutmeg
  • 1/4 cup chopped walnuts
  • Salt and pepper, to taste

Instructions:

  1. Preheat your oven to 400°F (200°C). Line a baking sheet with parchment paper.
  2. Toss the sweet potato cubes with olive oil, cinnamon, nutmeg, salt, and pepper until evenly coated.
  3. Spread the sweet potatoes in a single layer on the baking sheet. Roast for 25-30 minutes, flipping halfway through, until the sweet potatoes are tender and golden.
  4. In the last 5 minutes of roasting, sprinkle chopped walnuts over the sweet potatoes and return to the oven to toast the nuts.
  5. Serve warm as a side dish that is both festive and full of nutrients.

The natural sweetness of the sweet potatoes, combined with the warmth of cinnamon and the crunch of walnuts, makes this dish both delicious and nutritious.

3. Cranberry Apple Salad

Cranberries are often associated with the holidays, and while they’re typically served as a sauce, they can also be used in salads to add a burst of flavor and antioxidants. This cranberry apple salad is light, refreshing, and a great way to balance out richer holiday dishes.

Ingredients:

  • 2 cups fresh or frozen cranberries, thawed if frozen
  • 2 medium apples, diced
  • 1/4 cup chopped walnuts or pecans
  • 2 tablespoons honey or maple syrup
  • 1 tablespoon olive oil
  • 1 teaspoon lemon juice
  • 1/4 teaspoon ground cinnamon

Instructions:

  1. In a small bowl, whisk together honey, olive oil, lemon juice, and cinnamon to create the dressing.
  2. In a large bowl, combine the cranberries, apples, and nuts. Pour the dressing over the mixture and toss gently to combine.
  3. Let the salad sit for about 10-15 minutes before serving to allow the flavors to meld.

This simple salad is packed with antioxidants from the cranberries and apples, along with healthy fats from the nuts, making it a vibrant and nutritious addition to any holiday spread.

4. Pumpkin Chia Pudding

Desserts don’t have to be indulgent to be enjoyable. This pumpkin chia pudding is a healthy, satisfying way to end your holiday meal. Made with nutrient-packed chia seeds and the fall flavors of pumpkin, it’s a great source of fiber, healthy fats, and vitamins.

Ingredients:

  • 1 cup canned pumpkin puree
  • 1 cup unsweetened almond milk (or any milk of your choice)
  • 1/4 cup chia seeds
  • 2 tablespoons maple syrup or honey
  • 1/2 teaspoon ground cinnamon
  • 1/4 teaspoon ground ginger
  • 1/4 teaspoon ground nutmeg
  • 1/2 teaspoon vanilla extract

Instructions:

  1. In a medium bowl, whisk together the pumpkin puree, almond milk, maple syrup, cinnamon, ginger, nutmeg, and vanilla extract.
  2. Stir in the chia seeds, making sure they are evenly distributed.
  3. Cover and refrigerate the mixture for at least 4 hours or overnight, allowing the chia seeds to absorb the liquid and thicken.
  4. Serve chilled, topped with a sprinkle of cinnamon or a few chopped nuts for added texture.

This dessert is not only healthy but also a wonderful way to incorporate pumpkin, a rich source of beta-carotene, into your holiday festivities.

5. Holiday Hummus Platter with Veggies and Whole-Grain Crackers

For a light, festive appetizer, consider serving a colorful hummus platter. Hummus is a great source of plant-based protein and fiber, and when paired with fresh veggies and whole-grain crackers, it makes for a healthy and satisfying snack.

Ingredients:

  • 1 cup hummus (store-bought or homemade)
  • Sliced cucumber, bell peppers, carrots, and cherry tomatoes
  • Whole-grain crackers or pita bread

Instructions:

  1. Arrange the hummus in a small bowl in the center of a platter.
  2. Surround the hummus with an assortment of sliced vegetables and whole-grain crackers or pita bread.
  3. Serve immediately, encouraging guests to dip the veggies and crackers into the hummus for a nutritious, festive appetizer.

Final Thoughts

The holiday season is about sharing food, laughter, and memories, and with these recipes, you can provide your loved ones with meals that are both festive and nutritious. At the food pantry, we believe that nutritious food should be accessible to all, regardless of budget. By incorporating simple, wholesome ingredients like beans, sweet potatoes, and seasonal produce, you can create meals that nourish the body and celebrate the season. These recipes are just the beginning—get creative with what you have on hand, and don’t be afraid to experiment with flavors to make your holiday meals healthy, festive, and full of joy.

Chicken Noodle Soup – Good Any Time of Year

The Ultimate Comfort Food: Easy Chicken Noodle Soup Recipe

There’s nothing quite like a warm, hearty bowl of chicken noodle soup to make you feel cozy and comforted, especially when the weather turns chilly or when you’re feeling under the weather. This classic dish has been a family favorite for generations, offering a soothing combination of tender chicken, flavorful broth, and perfectly cooked noodles. Whether you’re looking for a simple meal to prepare after a busy day or a homemade remedy for a cold, this easy chicken noodle soup recipe will be your go-to.

In this post, we’ll walk you through how to make a delicious, homemade chicken noodle soup that’s quick, simple, and packed with flavor. Plus, we’ll share a few tips and tricks to elevate your soup to the next level.

Why Chicken Noodle Soup is the Ultimate Comfort Food

Chicken noodle soup has earned its reputation as a comforting, go-to dish. There’s something magical about the warmth of the broth, the satisfying slurp of the noodles, and the bite of tender chicken. This soup has been cherished not just for its delicious taste, but also for its healing qualities. Whether it’s a cold winter day or a moment when you need a pick-me-up, chicken noodle soup has a way of making everything feel a little bit better.

Additionally, chicken noodle soup is incredibly versatile. It can be made in countless ways to suit your taste. Some prefer a rich, hearty broth, while others like a lighter, more delicate version. Some people add vegetables like celery and carrots for extra texture and flavor, while others keep it simple with just chicken and noodles. No matter how you make it, the heart of the dish remains the same: a nourishing, soul-warming bowl of goodness.

Ingredients for the Best Chicken Noodle Soup

For this recipe, we’re keeping things simple, using basic ingredients you probably already have in your kitchen. The beauty of homemade chicken noodle soup is that you can adjust it to your tastes, but here’s what you’ll need to get started:

Ingredients:

  • 1 tablespoon olive oil
  • 1 medium onion, chopped
  • 2 garlic cloves, minced
  • 2 medium carrots, peeled and sliced
  • 2 celery stalks, sliced
  • 6 cups chicken broth (preferably low-sodium)
  • 2 cups cooked, shredded chicken (rotisserie chicken works perfectly)
  • 1 1/2 cups egg noodles (or any pasta you prefer)
  • Salt and pepper, to taste
  • 1/2 teaspoon dried thyme (optional for extra flavor)
  • 1 bay leaf (optional)
  • Fresh parsley (optional, for garnish)

Directions:

Step 1: Sauté the Aromatics

Start by heating the olive oil in a large pot or Dutch oven over medium heat. Add the chopped onion and garlic, and sauté for about 2-3 minutes until the onion becomes translucent and the garlic releases a fragrant aroma. This is the foundation of your soup’s flavor, so take your time to allow these ingredients to soften and caramelize just slightly.

Step 2: Add the Vegetables

Once the onion and garlic are softened, add the sliced carrots and celery to the pot. These vegetables add both flavor and texture to the soup. Stir them around and cook for about 5 minutes, allowing them to begin softening before adding the liquid.

Step 3: Pour in the Broth

Now it’s time to add the liquid! Pour in your chicken broth, and if you have a bay leaf and dried thyme, add those as well. The bay leaf infuses the soup with a subtle herbal flavor, and the thyme adds a lovely, aromatic touch. Bring the soup to a simmer, and let it cook for about 10 minutes. This allows the vegetables to soften and the flavors to meld together.

Step 4: Add the Chicken and Noodles

Once the vegetables have softened, it’s time to add the star ingredients: the shredded chicken and noodles. If you’re using leftover cooked chicken or a rotisserie chicken, simply shred the meat into bite-sized pieces and add it to the pot. Then, add the egg noodles (or your preferred pasta). Stir to combine, making sure the noodles are fully submerged in the broth.

Let the soup simmer for another 8-10 minutes, or until the noodles are tender and cooked through. Be sure to stir occasionally to keep the noodles from sticking to the bottom of the pot.

Step 5: Season and Taste

Once the noodles are cooked, give the soup a taste. Add salt and pepper to taste—this is where you can adjust the seasoning to your liking. If you’d like a bit more flavor, feel free to add a pinch of dried thyme, or even a dash of lemon juice to brighten up the flavors.

Step 6: Serve and Garnish

When the soup is finished, remove the pot from the heat. Ladle the soup into bowls and garnish with fresh parsley if desired. The vibrant green parsley adds a fresh, herbal note to the soup, and it looks great on top of the golden broth and vegetables.

Serve the soup hot with a side of crusty bread or crackers for dipping. It’s the perfect meal to enjoy with loved ones, or even just on your own when you’re craving something warm and satisfying.

Tips for the Perfect Chicken Noodle Soup

  • Use quality broth: The broth is the base of your soup, so choose a high-quality chicken broth or stock. If you have the time, homemade broth is even better—it’s packed with flavor and richness that store-bought versions can’t always match.
  • Shredded rotisserie chicken: For a shortcut, use store-bought rotisserie chicken. It’s already cooked and shredded, saving you time and adding extra flavor to the soup.
  • Use whole-grain or gluten-free noodles: Feel free to swap out the egg noodles for whole-grain, gluten-free, or even rice noodles if you prefer. The key is to use something that will absorb the broth without getting mushy.
  • Add extra veggies: If you like your soup extra hearty, you can add other vegetables like parsnips, potatoes, or spinach. These add more nutrition and flavor to the soup.
  • Make it ahead: Chicken noodle soup is even better the next day! Make a big batch and store leftovers in the fridge for up to 3 days. It can also be frozen for up to 3 months, but keep in mind that the noodles may absorb some of the broth after freezing.

Final Thoughts

This easy chicken noodle soup recipe is the perfect balance of comfort and convenience. It’s a meal that everyone can enjoy, and it’s simple enough for even a beginner cook to master. With just a handful of ingredients, you can create a warm, flavorful soup that’s ideal for feeding your family or soothing a cold. The best part is, it’s so easy to customize. Add your favorite vegetables, adjust the seasoning, or swap in different noodles—this recipe is as flexible as it is delicious.

So, the next time you’re craving something comforting or need a pick-me-up, give this homemade chicken noodle soup a try. You’ll be glad you did!

Holiday Meal Planning: Tips and Recipes


Introduction

photo of a man cooking a meal

The holiday season is a time of joy, connection, and tradition. Much of that comes to life around the dinner table. For many, the holidays mean gathering with family and friends to share special meals filled with warmth and celebration. However, planning these meals can be overwhelming—especially when working on a budget. By organizing ahead, you can create a memorable holiday meal that’s both affordable and stress-free.

In this article, we’ll share practical meal-planning tips. We will provide budget-friendly recipes. There will also be creative ideas to help you make the most of the season without breaking the bank.


Section 1: Benefits of Planning Ahead

Save Money
Planning your holiday meal early allows you to take advantage of sales on staple items. Look out for deals on pantry essentials like canned vegetables, pasta, or baking supplies. Buying these items in advance saves you from last-minute price hikes and reduces the overall expense of your meal.

Reduce Stress
Having a meal plan keeps you organized, reducing the holiday rush. With a clear list of tasks and ingredients, you’ll feel more in control, whether shopping, preparing dishes, or cooking.

Ensure Variety
When you plan your menu, ensure your meal includes a range of dishes. These should be appetizers, main courses, sides, and desserts. This variety helps you cater to different preferences and dietary needs, making the meal enjoyable for everyone.


Section 2: Meal Planning Tips

Set a Budget
Before planning your menu, determine a budget that suits your financial situation. Knowing your spending limit allows you to make choices that balance cost with quality, avoiding overspending on last-minute luxuries.

Create a Menu
Choose simple yet satisfying dishes that are crowd-pleasers. Holiday classics like roast chicken, stuffing, mashed potatoes, and apple crisp offer comfort and familiarity without high costs.

Make a Shopping List
List every ingredient needed for each recipe. A thorough shopping list helps you avoid last-minute trips and impulse buys, sticking closely to your budget.

Prep Ahead
Save time by preparing some elements in advance. For example, you can chop vegetables the night before, marinate meats, or even bake certain desserts early. Prepping ahead makes the final meal prep much faster and less stressful.

Use Pantry Staples
Maximize what’s already in your pantry. Beans, rice, canned veggies, and spices are versatile ingredients that help you create satisfying dishes without a long grocery list. Consider recipes that rely on these common staples to cut costs.


Section 3: Holiday Recipe Ideas

Appetizers
Start the meal with simple, crowd-pleasing appetizers. Try a veggie tray with a homemade hummus dip, which uses inexpensive ingredients like chickpeas, garlic, and lemon. Another great option is deviled eggs, which are easy to make in bulk and inexpensive.

Main Course
For an affordable yet impressive main dish, try roast chicken with herbs. It’s flavorful, simple to cook, and usually less expensive than other meats. For a vegetarian option, a hearty vegetable and bean casserole brings warmth and comfort to the table.

Sides
Classic holiday sides like mashed potatoes, stuffing, and roasted vegetables are filling and affordable. They are easy to make in large portions. Add seasonal herbs like rosemary or thyme to bring out festive flavors.

Desserts
Close out the meal with low-cost desserts. Try apple crisp, which uses seasonal fruit. It also uses pantry ingredients like oats and cinnamon. Holiday cookies and bread pudding are also delicious and can be made in large quantities without high costs.


Section 4: Budget-Friendly Substitutions

Holidays can get expensive, but you can easily make budget-friendly swaps without sacrificing taste.

  • Vegetables: Opt for frozen vegetables instead of fresh—they’re more affordable, and their quality remains high.
  • Bread: Use day-old bread for stuffing. It’s cheaper and just as delicious.
  • Herbs: If fresh herbs are pricey, dried herbs are a great substitute and are often already in the pantry.

Many pantry staples can stand in for pricier ingredients, so be creative with what you have on hand!


Section 5: Meal Planning for Large Groups

Cooking for a big gathering? Try these strategies to stretch your budget and space:

  • Scale Recipes: Double recipes for staples like mashed potatoes or stuffing, which are filling and well-loved.
  • Serve Buffet-Style: Setting up a buffet allows guests to help themselves. This approach makes serving easier. It ensures everyone gets what they need.
  • Make the Most of Your Space: Use slow cookers, toaster ovens, and other appliances. These tools help free up stove space. They also keep everything warm.

These tips make it easier to manage large groups and keep meal preparation efficient.


Conclusion

Planning ahead makes holiday meals more manageable and enjoyable. Set a budget first. Then, create a menu and prep in advance. This way, you’ll be able to celebrate the season with delicious dishes without unnecessary stress. You can craft a meal that brings everyone together through budget-friendly recipes. Creative substitutions also help keep it affordable.

We hope these tips and recipes inspire you to start planning your holiday meal today. If you need additional assistance or more recipe ideas, feel free to reach out to our food pantry team. We’re here to help make your holiday season special and stress-free. Happy holidays!

a cardboard box full of money with a tag on the box that says donate

Recipe of the Week – Turkey Chili

Here are three delicious turkey chili recipes for you to choose from:

  1. The Best Healthy Turkey Chili (from Ambitious Kitchen):
    • This healthy turkey chili is perfectly spiced, packed with protein, and incredibly flavorful. It’s a crowd-pleaser that you can make on the stovetop or in your slow cooker.
    • Ingredients:
      • Ground turkey
      • Red bell pepper
      • Yellow onion
      • Sweet corn (canned or frozen)
      • Mild chili powder, cumin, dried oregano, cayenne pepper, salt
      • Diced or crushed tomatoes
      • Chicken broth
      • Red kidney beans
    • Toppings: Fresh avocado, shredded cheese, sour cream, cilantro, tortilla chips, sliced jalapeños.
    • Get the full recipe here.

2. Simple Turkey Chili (from Allrecipes):

  • This straightforward turkey chili is hearty and flavorful. It tastes even better on the second day!
  • Ingredients:
    • Ground turkey
    • Onion
    • Garlic
    • Canned crushed tomatoes
    • Canned kidney beans
    • Chili powder, paprika, dried oregano, cayenne pepper, cumin, salt, black pepper
  • Serving Suggestions: Low-fat Cheddar cheese, low-fat sour cream, and crackers.
  • Find the detailed recipe here.

3. The Best Turkey Chili (from Mom On Timeout):

  • Quick and easy, this turkey chili is perfect for busy weeknights.
  • Ingredients:
    • Ground turkey
    • Onion
    • Garlic
    • Chili powder, cumin, cinnamon, salt, pepper
    • Crushed tomatoes, diced tomatoes, chicken broth
  • Check out the recipe here.

Feel free to choose the one that suits your taste and enjoy a warm bowl of comforting turkey chili! 🌶️🍲

sign askiing for donations on top of a pile of $100  bills